The difference between landscape lighting that looks professional and lighting that looks like a DIY afterthought almost always comes down to placement. The same fixtures, the same bulbs, the same transformer. Put them in the right spots at the right angles and the property looks stunning. Put them six inches too close or aimed five degrees off, and the effect falls flat.
This outdoor lighting placement guide covers the specific distances, angles, and positioning techniques we use on every project across Orange County. If you’ve been wondering where to place landscape lights, how far apart to space them, and what angles produce the best results, this is the resource you need.
For a broader overview of design principles, check out our outdoor lighting tips and tricks guide. This article goes deeper into the technical placement details.
Core Principles of Outdoor Light Positioning
Before getting into fixture-specific measurements, there are a few principles that apply to every landscape lighting layout.
Hide the fixture, reveal the light. Every placement decision should prioritize concealing the light source. Fixtures tucked behind plantings, recessed into the ground, or mounted above sightlines create better effects than exposed fixtures at eye level.
Distance and beam angle work together. A narrow beam (10 to 15 degrees) requires the fixture to be farther from the target. A wide beam (60 degrees) can sit closer. Adjusting one without considering the other leads to hot spots or dark gaps.
Plan for growth. Plants grow. Trees fill in. Shrubs expand. A fixture that’s perfectly positioned today may be blocked by foliage in two years. Professional landscape lighting placement accounts for mature plant sizes, not what the garden looks like the week after planting.
Test at night before finalizing. The only way to evaluate outdoor lighting fixture placement is after dark. Walk the property from every approach, check for glare from windows and seating areas, and adjust angles before burying wires and locking positions.
Path Light Spacing and Positioning
Path light spacing is one of the most common questions homeowners ask, and it’s one of the easiest areas to get wrong. Too close and the walkway looks like an airport runway. Too far apart and dark gaps create trip hazards.
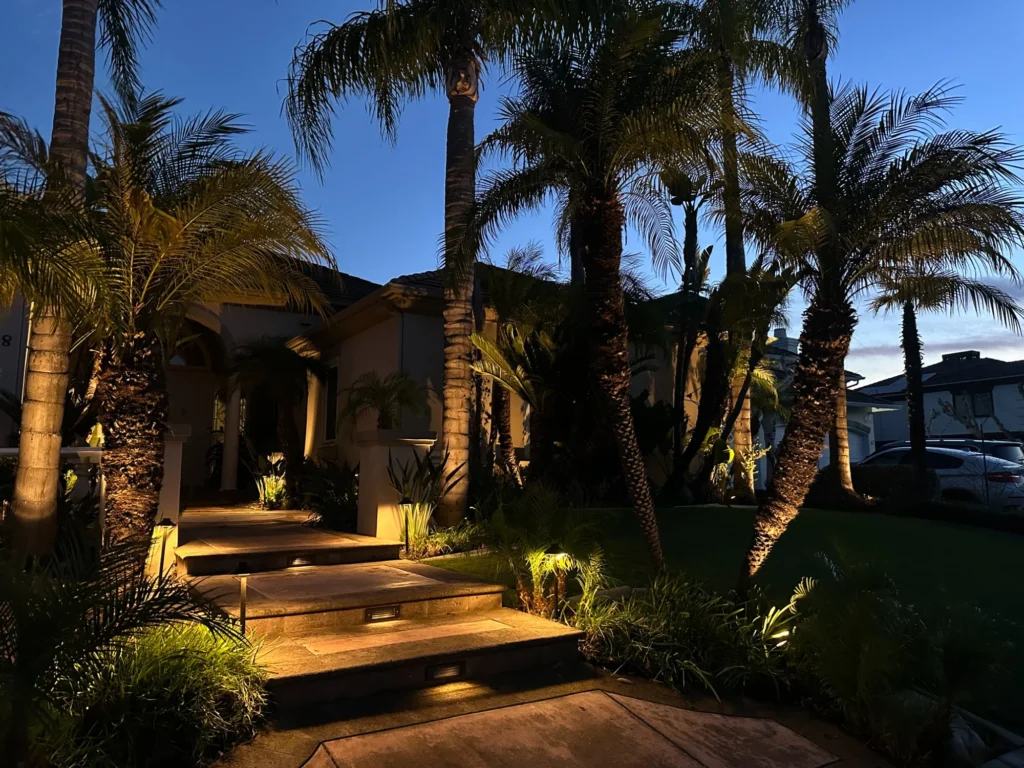
Recommended spacing: 6 to 8 feet apart on alternating sides of the walkway. This staggered pattern creates a gentle zigzag of light pools that guides foot traffic naturally without overwhelming brightness.
Curves and corners: Reduce spacing to 5 to 6 feet on curves, particularly on the inside edge where light falls off faster. Every direction change in a walkway should have a fixture nearby so visitors can see where the path goes next.
Steps and grade changes: Every step riser or elevation change needs dedicated lighting regardless of your regular spacing pattern. A missed step in the dark is a serious liability.
Front entry approach: For the final 10 to 15 feet leading to your front door, tighten spacing to 5 to 6 feet. This creates a welcoming brightening effect as guests approach the entrance.
As the Illuminating Engineering Society (IES) emphasizes in its residential guidelines, step and transition lighting is a critical safety priority that should never depend on general area lighting alone.
Tree Lighting Placement: Uplighting and Moonlighting
Tree lighting placement depends on the tree’s size, canopy shape, and the effect you want to achieve.
Small to medium trees (under 20 feet): Place a single spotlight 1 to 3 feet from the trunk, angled at approximately 30 to 45 degrees upward. Use a narrow beam (15 to 25 degrees) to catch the canopy without creating a harsh hot spot on the trunk.
Large canopy trees (20+ feet): Use two to three fixtures positioned 3 to 6 feet from the trunk at different angles. Cross-lighting from two sides eliminates flat, one-dimensional illumination and reveals the tree’s full dimensional form. For very large oaks or ficus, you may need fixtures with 35 to 50 watt equivalent output.
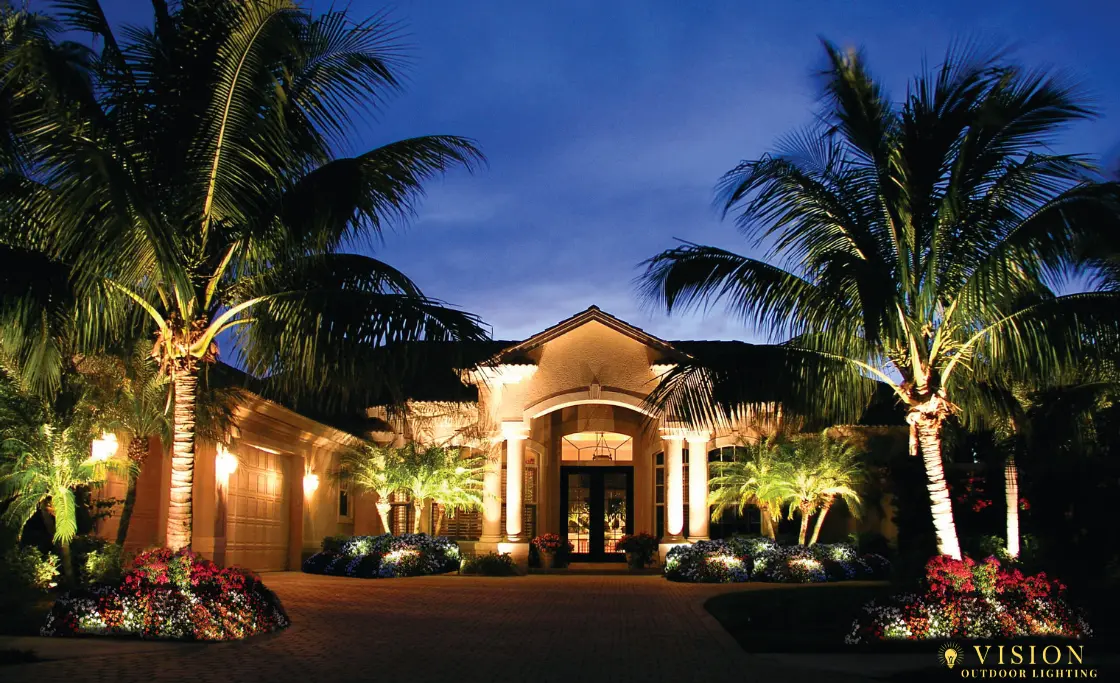
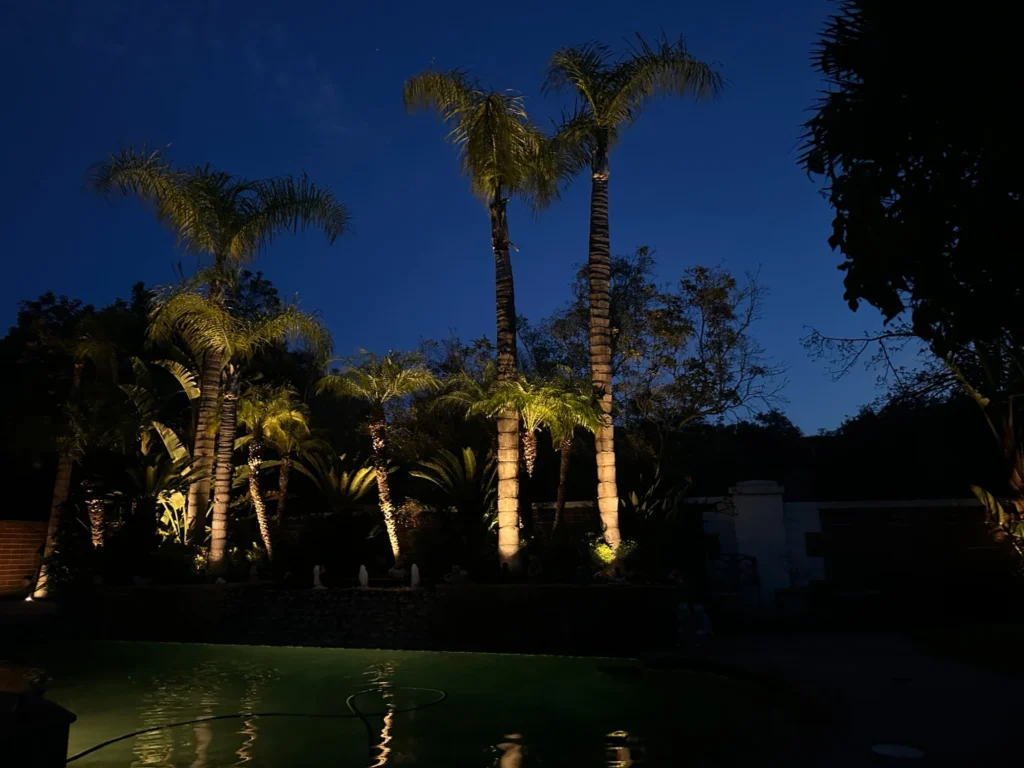
Columnar trees (palms, Italian Cypress): Position the fixture 1 to 2 feet from the base with a narrow beam (10 to 15 degrees) aimed straight up along the trunk. The goal is to wash the height of the trunk and illuminate the crown without spilling light to the sides.
Moonlighting (downlighting from trees): Mount fixtures 15 to 25 feet high in mature branches, angled downward at 45 to 60 degrees. Use wide beam angles (40 to 60 degrees) with lower brightness to mimic soft, filtered moonlight. This technique works best in trees with open canopies that create interesting shadow patterns.
Pro tip: If shrubs or groundcover at the tree’s base will block the uplight, mount the fixture on a riser to clear the foliage. A 6 to 12 inch riser solves most obstruction issues without making the fixture visible.
Lighting for Front of House: Architectural Placement
Architectural uplighting creates curb appeal by revealing your home’s facade, columns, and textured surfaces after dark. The landscape lighting distance from the house is critical to getting this right.
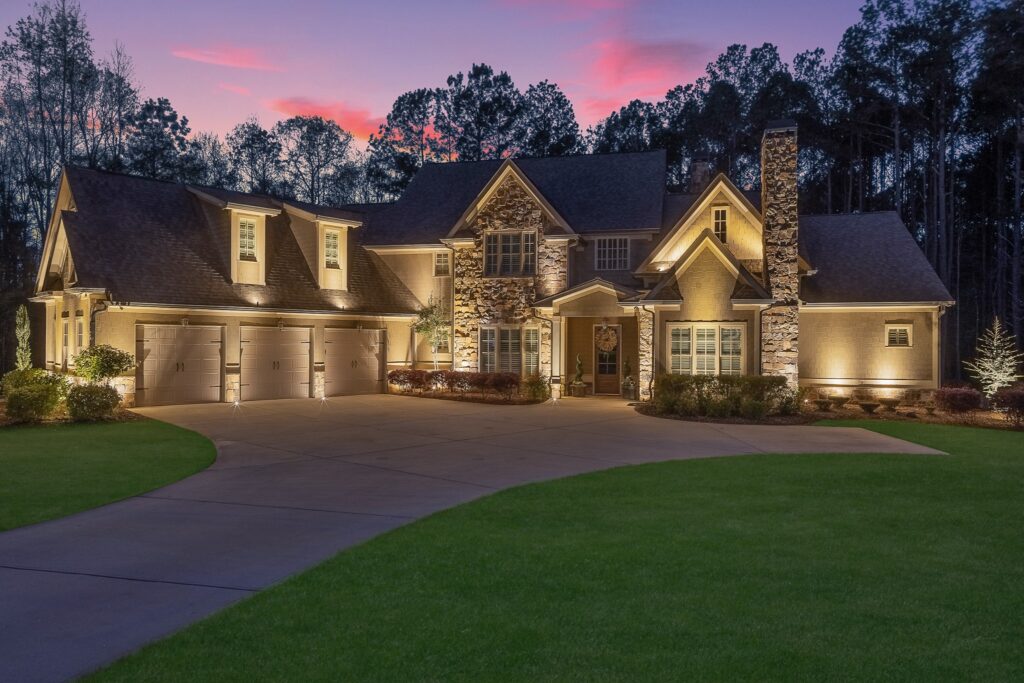
Facade uplighting: Position spotlights 1 to 2 feet from the foundation, angled at 45 to 60 degrees upward. For a single-story home, a 35 to 40 degree beam angle usually covers the full height. For two-story facades, you may need narrower beams (15 to 25 degrees) with higher output fixtures placed 2 to 4 feet from the wall.
Wall grazing (textured surfaces): To emphasize texture on stacked stone, brick, or stucco, place fixtures 6 to 12 inches from the wall and aim them nearly parallel to the surface. This shallow angle casts dramatic shadows across the texture that flat, head-on lighting would erase.
Columns and pillars: Use well lights or compact spotlights positioned directly at the base, centered on the column. One fixture per column, aimed straight up, creates a clean vertical wash.
Garage outdoor lighting: Position downlights or recessed soffit lights above the garage doors to wash light across the driveway approach. Supplement with low spotlights flanking the garage to uplight any adjacent architectural details or landscaping. Avoid mounting a single flood light above the garage, as this creates harsh, flat illumination with heavy shadows.
Up and Down Outdoor Lighting: When to Use Each
Understanding when to light up versus down is one of the most important decisions in any landscape lighting layout.
Use uplighting for: trees, architectural facades, columns, sculptures, and focal features. Uplighting creates drama by illuminating objects from an unexpected angle, revealing form and texture that daylight often flattens.
Use downlighting for: patios, dining areas, pathways (from overhead), seating areas under pergolas, and anywhere you want soft, natural-feeling ambient light. Downlighting from elevated positions mimics natural light sources and creates a more relaxed atmosphere.
Combine both for: front entries (uplighting on architecture plus downlighting on the walkway), outdoor kitchens (task downlighting above the counter plus accent uplighting on nearby trees), and pool areas (underwater uplighting in the pool plus moonlighting from overhead trees).
The most compelling landscape lighting placement uses both directions together to create depth. A property lit only from below feels theatrical. A property lit only from above feels institutional. The combination feels natural and intentional.
Hardscape, Well Light, and String Light Placement
Hardscape lights: Mount under wall caps, counter overhangs, and stair risers. Space them 18 to 24 inches apart for continuous, even wash on the surface below. For seat walls, position one fixture every 2 to 3 feet along the top cap.
Well lights: Recess flush with grade, positioned directly at the base of whatever you’re uplighting. Ensure proper drainage beneath the housing. Well lights placed in turf should sit deep enough to clear mower blades.
String lights: Hang 8 to 10 feet above the ground for comfortable clearance. Drape in gentle arcs rather than pulling taut. Use support cables or hooks rated for outdoor weight loads. For larger areas, create parallel runs spaced 8 to 12 feet apart for even coverage.
Common Outdoor Lighting Placement Mistakes
Placing uplights too close to the house. Fixtures jammed against the foundation aim too steeply and create a harsh, unflattering “spotlight from below” effect. Pull them out 12 to 24 inches and let the beam spread naturally across the surface.
Even spacing on both sides of a walkway. Parallel rows of path lights look rigid and institutional. Stagger them on alternating sides for a more natural, organic feel.
Ignoring sightlines from inside the house. A perfectly aimed spotlight might create blinding glare when viewed from a living room window or patio chair. Always check fixture positions from indoor and outdoor seating areas, not just from the curb.
Not planning for landscape growth. A spotlight perfectly positioned between two young shrubs will be completely blocked within a year or two as those plants mature. This kind of oversight is one of the most common reasons homeowners need landscape lighting repairs. Account for full-size plant dimensions when choosing fixture locations.
Using one fixture type everywhere. An effective outdoor lighting design combines multiple types of landscape lighting into a layered system. Relying on a single fixture type always produces flat, one-dimensional results.
Placement Considerations for Orange County Properties
Orange County’s climate and landscape create unique outdoor lighting placement considerations that don’t apply in other regions.
Coastal salt air corrodes exposed metal fixtures faster than inland conditions, which means placement decisions also affect fixture longevity. Fixtures positioned in direct irrigation spray zones or within the splash range of saltwater pools face accelerated degradation. Using commercial-grade solid brass fixtures in these locations extends lifespan dramatically compared to aluminum alternatives.
Southern California’s year-round growing season also means landscape changes happen fast. Trees and shrubs that are small at planting time can grow several feet per year, blocking fixtures that were perfectly placed during installation. Building regular adjustment visits into your maintenance schedule prevents this gradual decline in lighting quality.
Quick-Reference: Landscape Lighting Spacing and Distances
| Fixture Type | Distance/Spacing | Angle |
| Path lights | 6 to 8 ft apart, staggered sides | Downward |
| Tree uplights (small) | 1 to 3 ft from trunk | 30 to 45 degrees up |
| Tree uplights (large) | 3 to 6 ft from trunk, 2 to 3 fixtures | 30 to 45 degrees up |
| Moonlights | 15 to 25 ft high in branches | 45 to 60 degrees down |
| Facade uplights | 1 to 2 ft from foundation | 45 to 60 degrees up |
| Wall grazing | 6 to 12 in from wall | Nearly parallel to surface |
| Hardscape lights | 18 to 24 in apart under caps | Downward wash |
| String lights | 8 to 10 ft above ground | Draped in gentle arcs |
Frequently Asked Questions
What is the best lighting placement for the front of a house exterior?
Combine architectural uplighting 1 to 2 feet from the foundation with path lights staggered 6 to 8 feet apart along the walkway. Add accent spotlights on flanking trees or garden features, and consider a downlight or sconce at the front entry. The goal is creating layers that guide the eye from the street to the front door.
When should I use up and down outdoor lighting together?
Use both at front entries (uplights on columns, downlights on the walkway), outdoor kitchens (downlights for task lighting, uplights on nearby trees), and pool areas (underwater uplights combined with overhead moonlighting). Combining both directions creates the depth and dimension that single-direction lighting cannot achieve.
What is the most popular outdoor lighting approach right now?
Layered LED landscape lighting using warm white (2700K to 3000K) fixtures in commercial-grade brass remains the most popular approach for premium properties. Homeowners are moving away from single-type installations toward comprehensive systems that combine uplighting, path lighting, downlighting, and hardscape lighting into one cohesive design.
What are the best garage outdoor lighting ideas?
Install recessed soffit downlights above each garage door to wash the driveway with even light. Supplement with low spotlights flanking the garage to uplight adjacent architectural details or plantings. Avoid mounting a single flood light above the garage. Instead, create layers with a combination of down and accent lighting for a more polished, professional result.
How far from the house should landscape lights be placed?
For facade uplighting, 1 to 2 feet from the foundation works for most single-story homes. For wall grazing on textured surfaces, bring fixtures within 6 to 12 inches. For two-story facades, extend the distance to 2 to 4 feet and use narrower beam angles with higher output to reach the roofline.
Get Professional Outdoor Lighting Placement for Your Property
This outdoor lighting placement guide covers the principles behind every decision, but applying them to a specific property is where expertise makes the biggest difference. Every home has unique architecture, landscaping, elevation changes, and sightlines that affect how these measurements translate into real results.
At Vision Outdoor Lighting, we personally design every system on-site after dark, testing angles, distances, and fixture combinations in real conditions before anything is installed permanently. Every project across Newport Beach, Irvine, Laguna Niguel, and Orange County gets this level of attention.
Schedule Your Free Design Consultation by visiting our contact page or calling us directly at (949) 877-3600.
Explore our landscape lighting resources for more tips and ideas.