A well-lit tree can become the single most striking element on a property after dark. The branches catch light and cast shadows. The canopy glows against the night sky. The trunk reveals texture and form that daylight tends to flatten. Done right, tree lighting turns mature landscaping into living sculpture.
Done wrong, it creates hot spots on bark, blinds anyone sitting nearby, or wastes expensive fixtures on techniques that don’t match the tree’s shape. The best way to light a tree depends on the species, the canopy structure, the surrounding landscape, and the effect you want to create.
This guide covers every major tree lighting method, from uplighting and moonlighting to cross-lighting and silhouetting. You’ll learn specific distances, angles, and fixture recommendations for the tree species most common in Orange County landscapes. For a broader overview of fixture types and design principles, start with our landscape lighting tips and guide.
Tree Uplighting Techniques: The Foundation of Landscape Tree Lighting
Uplighting trees is the most popular and versatile approach to landscape tree lighting. A fixture at ground level aims upward into the canopy, revealing form, texture, and color that disappear after sunset. Understanding how to uplight a tree properly starts with three variables: distance from the trunk, beam angle, and fixture count.
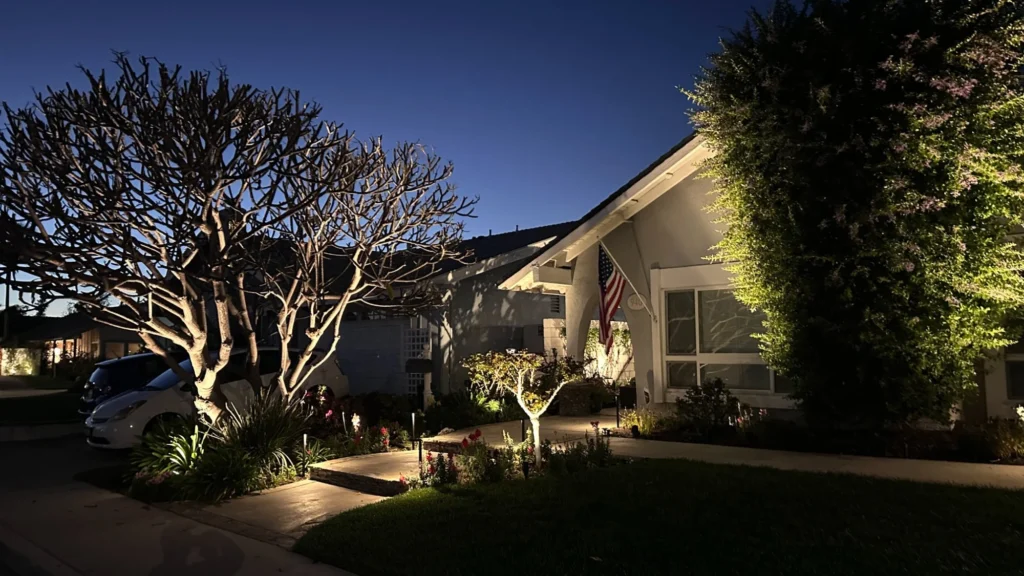
Small to Medium Trees (Under 20 Feet)
For trees under 20 feet tall, like young oaks, Japanese maples, or ornamental citrus, a single fixture typically provides enough coverage. Position it 1 to 3 feet from the trunk at a 30 to 45 degree upward angle. Use a narrow to medium beam (15 to 25 degrees) so the light catches the canopy without spilling past the edges.
Aim the beam slightly off-center rather than directly at the trunk. This reveals more of the branch structure and avoids a harsh bright spot on the bark that makes the tree look like it’s under interrogation.
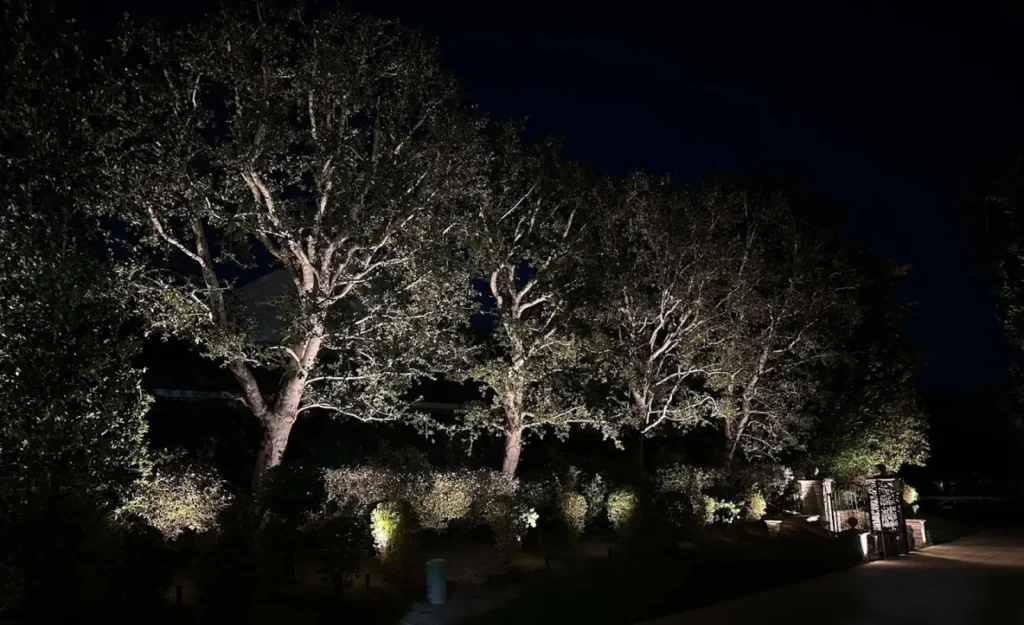
Large Canopy Trees (20+ Feet)
Mature oaks, ficus, and eucalyptus trees need two to three fixtures positioned 3 to 6 feet from the trunk at different angles. This cross-lighting technique eliminates the flat, one-dimensional look that a single fixture creates on a large canopy.
Place fixtures roughly 120 degrees apart around the trunk for even coverage on a three-fixture setup, or 180 degrees apart for two fixtures. Each light should have a 20 to 35 degree beam angle with enough output (35 to 50 watt equivalent) to reach the upper canopy.
For Orange County’s large coastal live oaks and spreading ficus, this multi-fixture approach is essential. These trees have canopies too broad and dense for a single light to cover.
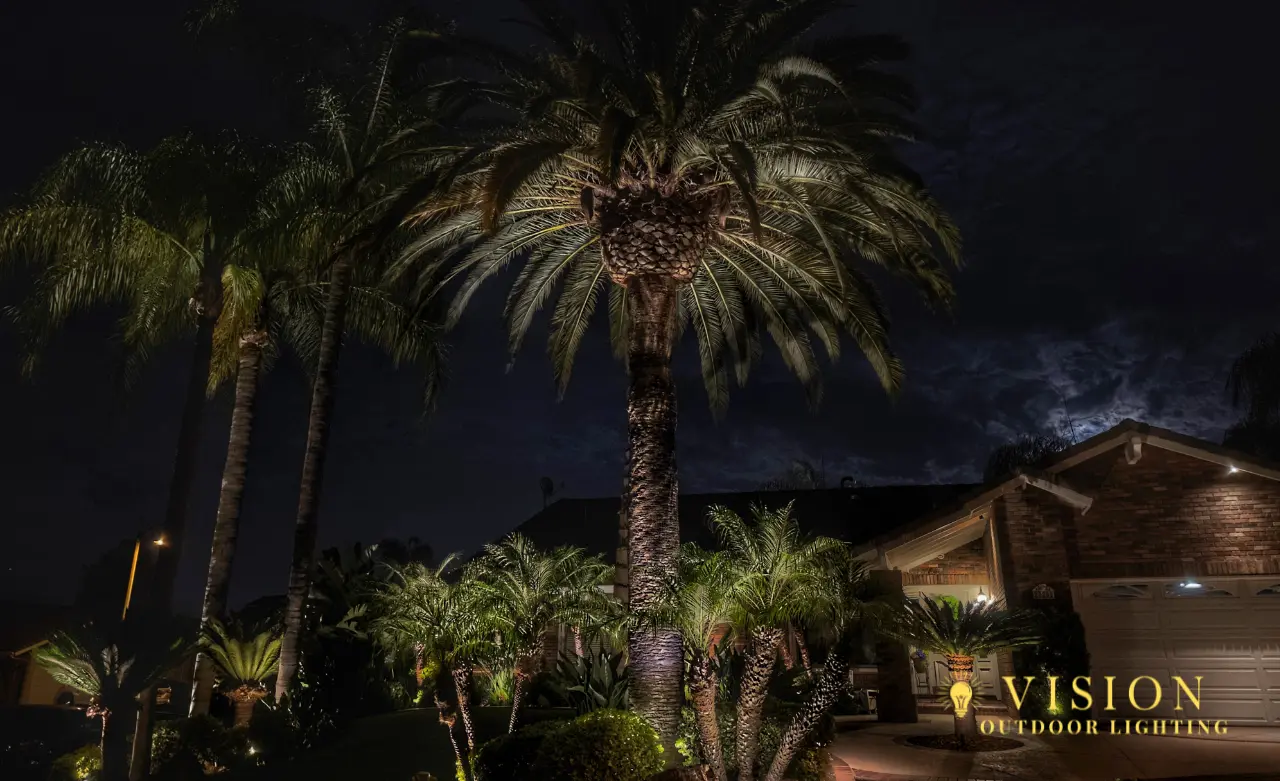
Palm Trees and Columnar Species
Palms, Italian Cypress, and other columnar trees require a different approach. Position a single fixture 1 to 2 feet from the base with a very narrow beam (10 to 15 degrees) aimed straight up along the trunk. The goal is to wash the full height of the trunk and illuminate the crown without a wide light spill.
For tall King or Queen palms (common throughout Newport Beach and Dana Point), you may need a fixture with higher lumen output to reach the fronds 30 to 40 feet above. A standard low-output LED won’t push enough light to make the crown visible from the ground.
Moonlighting Trees: The Art of Downlighting From Above
Moonlighting trees is one of the most beautiful outdoor tree lighting ideas available. Instead of lighting from below, you mount fixtures high in the branches and aim them downward. The light filters through leaves and branches, casting soft, dappled shadows on the ground that mimic natural moonlight.
Ideal mounting height: 15 to 25 feet up in the canopy, secured to a major branch with a non-damaging mounting bracket.
Beam angle: 40 to 60 degrees wide, aimed downward at 45 to 60 degrees from horizontal.
Best candidates: Mature oaks, large ficus, jacarandas, and any tree with an open enough canopy to let filtered light through. Dense evergreens block too much light for effective moonlighting.
Downlighting trees is especially effective over patios, dining areas, and seating zones. It provides functional ambient light for the space below while creating the shadow patterns that make the area feel warm and inviting.
Top or Bottom: Is It Better to Light a Tree From Above or Below?
This is one of the most common questions homeowners ask, and the answer depends on what you want to accomplish.
Light from below (uplighting) when you want to showcase the tree itself as a focal point. Uplighting reveals trunk texture, branch structure, and canopy shape. It creates drama and draws the eye upward. This is the best way to light a tree that you want people to notice and admire.
Light from above (moonlighting/downlighting) when you want to create atmosphere in the space beneath the tree. Downlighting is about the experience on the ground, not the tree itself. It’s ideal for outdoor living areas, paths, and gathering spaces sheltered by canopy.
Combine both for the most complete effect. Uplight the trunk and lower canopy to showcase the tree’s form, then moonlight from higher branches to cast ambient light on the area below. This combination is one of the most effective tree lighting methods professionals use on premium properties.
More Outdoor Tree Lighting Ideas: Silhouetting, Shadowing, and Grazing
Silhouetting: Place a light behind the tree and aim it at a wall or fence. The tree becomes a dark silhouette against the illuminated background. This works beautifully with trees that have interesting branch patterns, like crape myrtles or mature Japanese maples.
Shadowing: Place a light in front of the tree and aim it so the tree casts shadow patterns against a nearby wall. The shadows move gently with the breeze, creating a living art effect. Ornamental grasses and open-branched trees produce the best shadow patterns.
Trunk grazing: Position a fixture very close to the base (6 to 12 inches) and aim it nearly parallel to the trunk surface. This technique emphasizes bark texture on species with interesting trunks, like mature eucalyptus, melaleuca, or Palo Verde trees.
For more on how these techniques work within a broader design, see our guide to types of landscape lighting and how they combine in a professional system.
Protecting Trees and Choosing the Right Fixtures
Mature trees on Orange County properties represent years of growth and significant value. Lighting them properly means protecting them in the process.
Never drill into trunks or branches. All mounting hardware should use non-invasive brackets that strap around branches without penetrating bark. According to International Society of Arboriculture tree care best practices, drilling creates entry points for disease and pests that can compromise tree health over time.
Respect root zones. When burying uplighting fixtures at the base of a tree, avoid severing major roots. Professional installers know how to position fixtures and route wiring without damaging the root system that keeps the tree healthy.
Use adjustable mounts. Trees grow. Branches shift. A fixture that’s perfectly aimed today may need adjustment in a year as the canopy fills in. Adjustable mounting brackets and swivel bases make seasonal re-aiming simple without removing or replacing the fixture. Building this into your regular landscape lighting maintenance schedule keeps every tree looking its best year-round.
Choose fixtures built to last. Tree uplights outdoor environments demand commercial-grade solid brass construction. In Orange County’s coastal climate, aluminum and plastic fixtures corrode within a few years from salt air, irrigation spray, and soil contact. Brass develops a protective patina and lasts 20+ years, matching the lifespan of the trees they illuminate. For professional tree lighting installation, fixture quality is as important as placement.
Consider coastal wind. Properties near the coast experience regular onshore winds that can shift lightweight fixtures. Stake-mounted uplights should be secured firmly, and branch-mounted moonlighting fixtures need robust clamp systems that resist vibration.
Common Tree Lighting Mistakes to Avoid
Placing the fixture too close to the trunk. A fixture jammed against the base creates a blinding hot spot on the lower trunk and barely reaches the canopy. Pull it out 1 to 3 feet minimum for small trees, 3 to 6 feet for large specimens.
Using one fixture on a large tree. A single light on a 30-foot oak produces flat, one-sided illumination that looks incomplete from every other angle. Large trees need two to three fixtures for dimensional coverage.
Over-lighting or wrong beam angle. More fixtures does not mean better lighting. Two to three well-placed fixtures create more impact than six poorly positioned ones. Match beam angle to canopy shape: narrow spots for palms, wider floods for spreading oaks.
Forgetting to re-aim after growth. Trees grow several feet per year in Southern California’s climate. Without annual adjustment, fixtures that were perfectly aimed at installation will be pointing at empty space or blocked by new growth within a season or two.
Quick-Reference: Tree Lighting Placement by Species
| Tree Type | OC Examples | Distance | Beam Angle | Fixtures |
| Small/Medium | Japanese maple, citrus, crape myrtle | 1 to 3 ft | 15 to 25° | 1 |
| Large Canopy | Coast live oak, ficus, jacaranda | 3 to 6 ft | 20 to 35° | 2 to 3 |
| Palms | King palm, Queen palm, Mexican fan | 1 to 2 ft | 10 to 15° | 1 |
| Columnar | Italian Cypress, podocarpus | 1 to 2 ft | 10 to 15° | 1 |
| Moonlighting | Oak, ficus, jacaranda (open canopy) | In canopy | 40 to 60° | 1 to 2 |
Frequently Asked Questions About Tree Lighting
What is the proper way to put lights on a tree?
For permanent landscape lighting, the best approach is ground-mounted uplights positioned 1 to 6 feet from the trunk (depending on tree size) aimed upward at 30 to 45 degrees into the canopy. Use non-invasive mounting for any fixtures in branches. Avoid drilling into trunks or wrapping wires tightly around limbs, as this damages bark and creates entry points for disease.
What are the 4 types of lighting used in landscape design?
The four main types are ambient (general area illumination), task (functional safety lighting), accent (highlighting features like trees and architecture), and decorative (fixtures that add visual personality). Tree lighting falls under accent lighting, though moonlighting from branches also provides ambient illumination for the space below.
How do you light a tree with landscape lighting?
Start by identifying the tree’s shape and size. For small trees, one uplight 1 to 3 feet from the trunk works. For large trees, use two to three fixtures spaced around the trunk at 3 to 6 feet out. For palms, use a single narrow-beam fixture at the base aimed straight up. Always use warm white LEDs (2700K to 3000K) and commercial-grade brass fixtures for lasting results.
What are the best lights for uplighting trees?
Commercial-grade solid brass spotlights with adjustable beam angles and warm white LED lamps (2700K to 3000K) are the best choice. Look for lamp-ready fixtures that accept MR16 bulbs so you can adjust brightness and beam angle without replacing the entire fixture. Brass is especially important in coastal areas where salt air corrodes aluminum within a few years.
What is the best method for stringing lights on a tree?
For decorative string lighting on trees, start at the trunk and work outward along major branches, wrapping loosely to allow for growth. Use commercial-grade LED string lights rated for outdoor use and leave slack at connection points so wind movement doesn’t stress the wiring. Secure strings with non-invasive tree clips rather than staples or nails that damage bark.
Do tree uplights increase property value?
Professionally designed landscape lighting, including tree uplighting, consistently increases both curb appeal and perceived property value. Mature trees are already one of the most valuable landscape assets on any property. Illuminating them after dark extends their visual impact and creates the kind of nighttime presence that makes properties memorable.
Ready to Showcase Your Trees With Professional Lighting?
The best way to light a tree starts with understanding the species, the canopy, and the effect you want. But translating these principles into a system that looks effortless takes hands-on experience with hundreds of different trees across dozens of property styles.
At Vision Outdoor Lighting, every project is designed on-site after dark, testing tree lighting placement with temporary fixtures before committing to final positions. We use commercial-grade solid brass on every installation because Orange County’s coastal climate demands materials that perform for 20+ years alongside the trees they illuminate.
Schedule Your Free Design Consultation by visiting our contact page or calling us directly at (949) 877-3600.
Explore our landscape lighting resources for more tips and ideas.