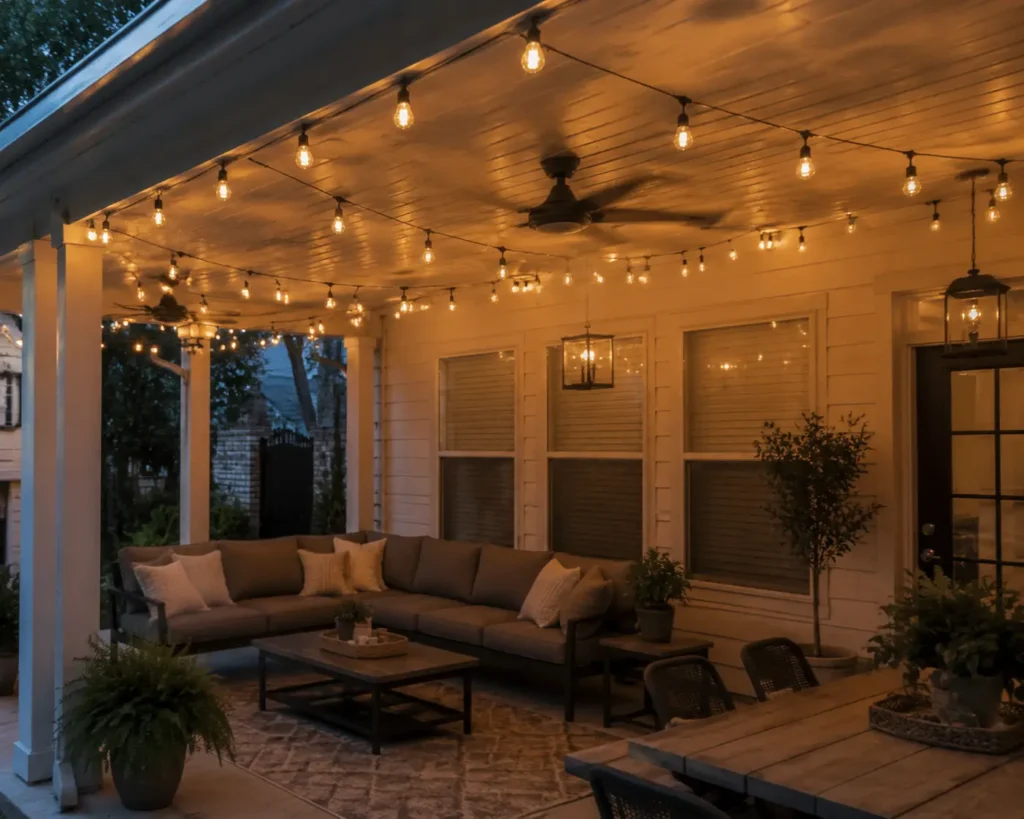
String lights transform covered patios into inviting outdoor living spaces where family and friends naturally gather after sunset. The warm, ambient glow creates an intimate atmosphere that makes ordinary evenings feel special, whether you’re hosting dinner parties or simply relaxing with a book.
Hanging string lights on a covered patio seems straightforward until you start planning the layout, choosing mounting hardware, and considering weather exposure. This guide walks through proven methods for hanging patio string lights, from temporary seasonal setups to permanent installations that withstand Orange County’s year-round outdoor living conditions.
You’ll learn specific techniques for different patio structures, proper spacing for even light distribution, power source options, and when professional installation delivers better long-term value than DIY approaches.
Planning Your Covered Patio String Light Layout
Successful string light installation starts with thoughtful planning before any hooks reach your patio ceiling. Walking your space and visualizing the finished result prevents common mistakes that create uneven lighting or awkward wire placement.
Measure your patio dimensions accurately. Note the distance between support posts, beams, or mounting points where you’ll attach the lights. Account for the height of your ceiling and any obstacles like ceiling fans or hanging plants that could interfere with the light strings.
Decide on your lighting pattern. Popular options include parallel lines running the length of the patio, a zigzag pattern that creates visual interest, or a perimeter outline that defines the space. Consider how people move through your patio and where you want the most light concentration.
Calculate the total string length needed. Add up all the runs you’re planning, then add 20 percent extra for curves, draping, and connections to power sources. Running short on string length mid-installation creates frustrating interruptions.
Sketch your layout on paper. Mark mounting points, measure distances between them, and note which direction wires will run to reach electrical outlets. This reference prevents confusion during installation and helps you gather the right materials before starting work.
Orange County homeowners increasingly view patios as extensions of their indoor living areas. Thoughtful lighting design transforms these outdoor living spaces into functional rooms for dining, entertaining, and relaxation well into the evening hours.
Professional lighting designers understand how different fixture types work together to create balanced, functional outdoor spaces. If you’re planning extensive patio improvements, learning how to install landscape lighting basics helps you communicate effectively with contractors about your vision.
Essential Tools and Materials for Hanging String Lights on Patio
Gathering proper materials before starting prevents multiple trips to the hardware store and ensures secure, lasting installation.
Hardware for mounting:
- Cup hooks or screw eyes sized appropriately for your ceiling material
- Guide wire or coated steel cable for supporting long runs
- Wire rope clips or cable clamps for securing guide wires
- Wall anchors if attaching to stucco or masonry
- Turnbuckles for tensioning guide wires
Tools needed:
- Drill with appropriate bits for your ceiling material
- Screwdriver or drill driver bits
- Ladder tall enough to reach your ceiling comfortably
- Tape measure and pencil for marking mounting points
- Wire cutters for trimming guide wire
- Level for ensuring straight installations
Electrical supplies:
- Outdoor-rated string lights with proper weatherproofing
- Outdoor extension cords if needed (heavy-duty, weatherproof)
- GFCI outlet protection
- Cable clips or staples for securing power cords
- Timer or smart switch for automated control
Choose cup hooks rated for at least 10 pounds if you’re hanging lights directly. For guide wire installations supporting heavier commercial-grade lights, use screw eyes rated for 25 pounds or more. Undersized hardware fails quickly, creating safety hazards and requiring frustrating reinstallation.
How to Hang String Lights on Covered Patio with Hooks
The hook method works well for lighter string lights and temporary seasonal installations. It’s the simplest approach for homeowners who want flexibility to change layouts or remove lights during winter months.
Step 1: Mark your mounting points
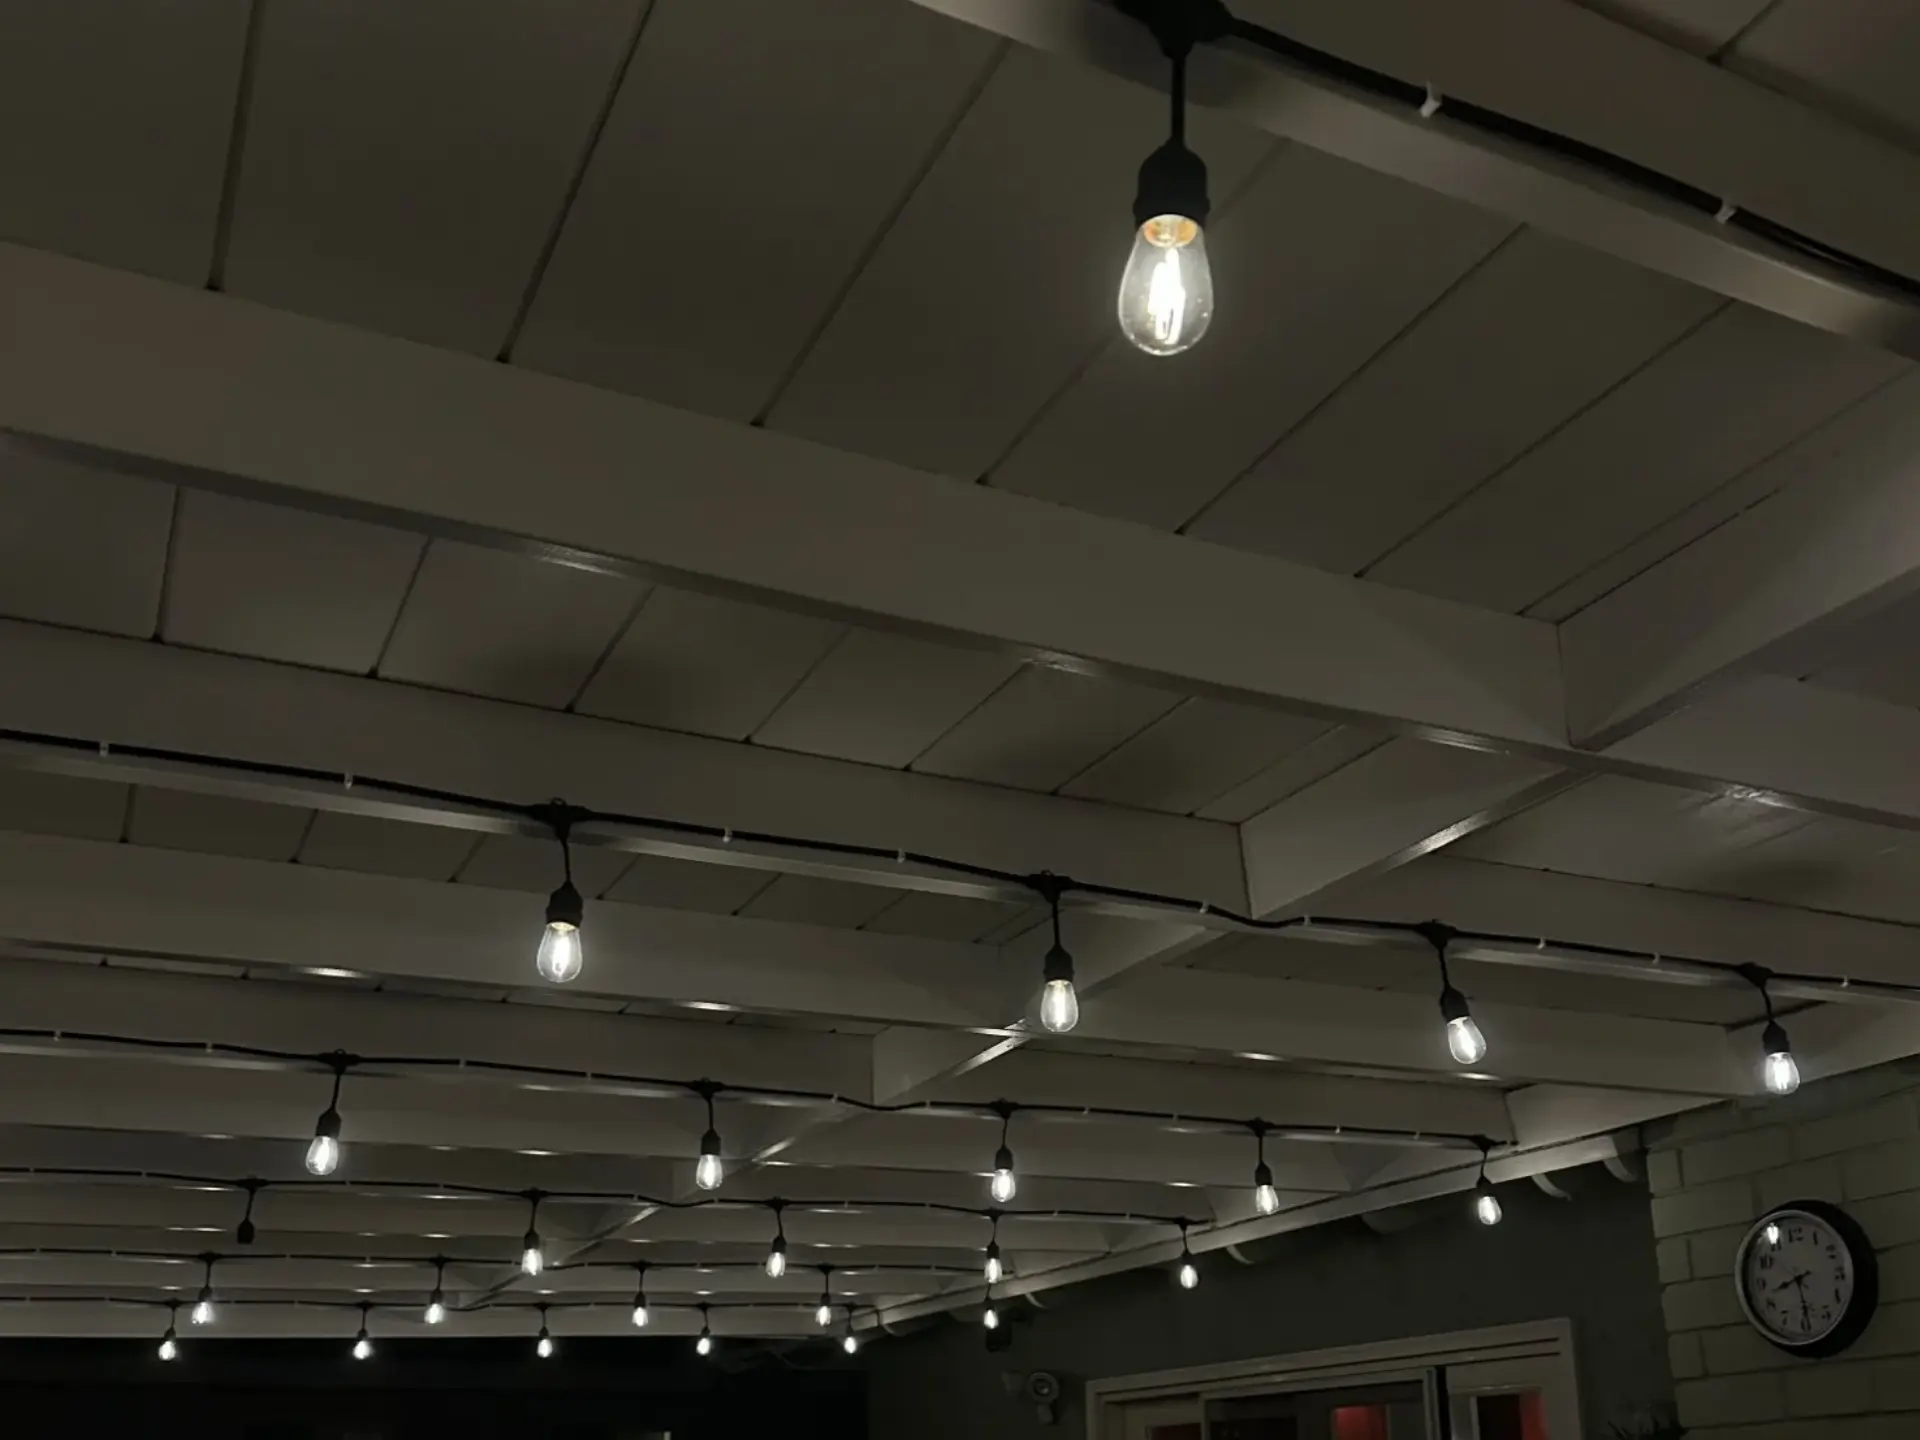
Use your layout plan to mark where hooks will attach to ceiling beams, rafters, or the underside of your patio roof. Space mounting points 3 to 4 feet apart for gentle draping, or closer together for a tighter line.
Hold your string lights up to visualize the drape between mounting points before installing hardware. Adjust spacing if the drape looks too deep or too shallow.
Step 2: Pre-drill pilot holes
Even for cup hooks, pre-drilling prevents wood from splitting and makes installation easier. Use a drill bit slightly smaller than your hook shaft diameter. For wood beams, drill about two-thirds the depth of the hook threads. For stucco or concrete ceilings, use appropriate masonry anchors.
Step 3: Install hooks
Screw cup hooks in by hand, using pliers for the final tightening if needed. Don’t overtighten, which can strip threads or crack the ceiling material. Hooks should sit firmly but not stress the mounting surface.
Orient hooks so the opening faces the direction you’ll string your lights. This prevents the light strand from slipping out during installation.
Step 4: Hang your string lights
Start at the power source end and work your way across your pattern. Drape lights between hooks, adjusting the slack to create even curves. For longer runs, have a helper hold sections while you clip them into place.
Secure the light strand in each hook rather than just draping it over. This prevents wind from shifting your carefully planned layout.
Step 5: Secure power cords
Use cable clips to fasten power cords along beams or posts where they run to outlets. Keep cords away from high-traffic areas where people might trip. All outdoor connections should use weatherproof covers and GFCI protection.
The hook method works for seasonal installations, but frequent removal and reinstallation eventually loosens mounting points. For year-round use, consider more permanent solutions.
How to Hang String Lights on Covered Patio Without Drilling
Not everyone wants to drill holes in their patio ceiling, especially renters or homeowners with newer construction. Several no-drill methods provide alternatives, though each comes with tradeoffs.
Adhesive hooks:
Heavy-duty outdoor adhesive hooks claim to hold several pounds when properly applied to clean, smooth surfaces. The reality is more complicated. These work best on painted wood or smooth stucco when temperatures stay moderate. Orange County’s summer heat can weaken adhesives, causing hooks to fail and lights to fall.
Apply adhesive hooks to thoroughly cleaned surfaces and allow the full curing time recommended by the manufacturer before hanging any weight. Test each hook by pulling firmly before trusting it with your lights.
Gutter clips:
If your covered patio has gutters, specialized clips designed for holiday lights can support string light installations. These slide over gutter edges and provide hanging points without drilling. Spacing is limited to where gutters run, restricting your layout options.
Tension rods:
For patios with posts or walls at both ends, heavy-duty tension rods can span the distance and support string lights. This works for narrow patios, typically under 10 feet wide. Beyond that distance, tension rods either aren’t available or lack sufficient rigidity to prevent sagging.
Freestanding poles:
Decorative poles or shepherd’s hooks placed around your patio perimeter create mounting points without attaching anything to your structure. This approach requires drilling into your patio surface to secure pole bases, but avoids touching the overhead structure. The tradeoff is visible poles that take up space and change your patio’s appearance.
Professional alternative:
For permanent installations without visible mounting hardware, professional installers can integrate string lights into architectural features using concealed mounting systems that don’t require obvious drilling into ceiling surfaces. This approach delivers clean results without compromising the structure.
Related Read: How to Hang Outdoor Lights: Complete Installation Guide for Orange County Homes
How to Hang String Lights on Covered Patio Using Guide Wire
Guide wire installation creates a professional appearance and supports heavier commercial-grade string lights better than direct hook mounting. This method works especially well for long spans where sagging becomes problematic.
Step 1: Install end anchors
Mount heavy-duty screw eyes at opposite ends of your planned wire run. These need substantial holding power since they’ll support the entire weight of the wire and lights. For wood posts, use screw eyes at least 3 inches long. For masonry or stucco, install heavy-duty anchors first.
Position anchors at the same height to keep your guide wire level. Use a laser level or water level for accuracy across long distances.
Step 2: Run the guide wire
Cut coated steel cable to length, leaving extra for adjustments. Thread one end through a screw eye and secure it with wire rope clips, also called cable clamps. You’ll need at least two clips per connection, positioned according to manufacturer specifications.
Step 3: Tension the wire
Run the wire to the opposite anchor point and add a turnbuckle before making the final connection. The turnbuckle allows you to adjust wire tension after installation. Secure the wire end with rope clips as before.
Tighten the turnbuckle to remove slack from the wire. The wire should be taut but not guitar-string tight. Over-tensioning can pull anchors loose or bend support posts.
Step 4: Attach string lights to guide wire
Use plastic zip ties or specialized light clips to attach your string lights to the guide wire. Space attachment points every 12 to 18 inches to prevent sagging between clips. The guide wire carries the weight; the lights simply hang from it.
Step 5: Check and adjust
Step back and observe the installation from multiple angles. Make small tension adjustments with the turnbuckle if needed. The wire and lights should form clean, intentional lines without visible sagging.
Guide wire installations represent substantial improvements over simple hook methods, but they’re also more visible and permanent. They work best when integrated into your patio’s design rather than added as an afterthought.
How to Install Patio String Lights on Different Ceiling Types
Your patio ceiling material determines which mounting methods work best and what special considerations apply.
Wood beam ceilings:
Wood beams offer the easiest installation. Pre-drill pilot holes slightly smaller than your hardware, then install cup hooks or screw eyes. Wood holds hardware securely and allows repositioning if you change your layout later.
Locate solid beams rather than hollow decorative trim. Tap along the ceiling to find solid spots, or use a stud finder if beams are hidden behind finished surfaces.
Stucco or plaster ceilings:
Stucco requires special anchors that won’t pull out under weight. Drill holes with a masonry bit, insert plastic anchors, then install screw eyes or hooks into the anchors. The anchor expands behind the stucco to distribute weight across a larger area.
Clean dust from drilled holes before inserting anchors. Debris prevents proper anchor expansion and reduces holding power.
Composite or vinyl ceiling panels:
Lightweight ceiling panels don’t support much weight. Look for solid framing behind panels where you can install anchors. If the structure allows, consider running guide wire between posts or beams rather than mounting directly to ceiling panels.
Never mount heavy lights to unsupported vinyl or composite panels. The material will tear, bend, or pull loose, damaging both your lights and your ceiling.
Open rafter ceilings:
Exposed rafters provide built-in mounting points along their length. Install hooks into rafter sides rather than the bottom edge, which is often decorative molding without structural strength. Space hooks to follow your lighting pattern.
Lattice or pergola-style ceilings:
Lattice creates numerous mounting opportunities but requires small hooks or ties that fit between slats. Weave lights through the lattice for an integrated look, or run guide wire across the structure and attach lights to the wire.
Understanding your ceiling structure helps you choose appropriate hardware and methods for successful installation.
Proper Spacing and Hanging Techniques for Covered Patio String Lights
String light spacing affects both aesthetics and functionality. Too far apart creates dark gaps. Too close together wastes fixtures and creates cluttered appearance.
General spacing guidelines:
For most residential patios, space mounting points 3 to 4 feet apart. This creates gentle, natural-looking curves in your light strands while providing even illumination. Commercial-grade bistro lights with larger bulbs can span slightly greater distances.
Adjusting for ceiling height:
Higher ceilings allow greater spacing between mounting points since the increased distance from the floor makes deep curves less noticeable. Lower ceilings require tighter spacing to prevent lights from hanging into headspace.
For 8-foot ceilings, maintain 3-foot spacing. For 10-foot or higher ceilings, you can extend to 4 or even 5 feet between points without excessive draping.
Creating consistent drape:
Mark all your mounting points before installing any hardware. Use a story pole or marked measuring stick to maintain consistent spacing. Even small variations become obvious once lights are hung, creating an unplanned, haphazard appearance.
Testing before finalizing:
After installing mounting hardware, drape a practice strand of lights to verify your spacing works as intended. Make adjustments before hanging your final lights. Moving hooks after lights are installed disrupts your completed sections.
Avoiding excessive weight on single points:
Don’t connect multiple light strands to single mounting points, which concentrates weight and increases failure risk. Instead, bring each strand to its own hook, even if hooks sit close together.
Planning for bulb replacement:
Ensure your hanging height allows comfortable bulb access without requiring ladders for routine maintenance. String lights hung too high create ongoing frustration when bulbs burn out.
Power Source Options and Electrical Safety
Proper electrical planning prevents safety hazards and ensures reliable operation of your covered patio string lights. Following outdoor electrical safety guidelines protects both your property and the people using your outdoor spaces.
Outdoor outlet requirements:
All outdoor electrical outlets should include GFCI (Ground Fault Circuit Interrupter) protection, which shuts off power if moisture or ground faults are detected. This safety feature is required by electrical code for outdoor locations.
If your patio lacks GFCI-protected outlets, install them before hanging lights. GFCI outlets are inexpensive and can be installed as replacements for standard outlets, or you can use portable GFCI adapters that plug into existing outlets.
Extension cord selection:
When extension cords are necessary, use only outdoor-rated cords with sufficient gauge for your light load. Lightweight indoor extension cords overheat and create fire hazards when used outdoors.
For runs under 50 feet with typical string light loads, 14-gauge cord works adequately. For longer runs or higher wattage, upgrade to 12-gauge. Never daisy-chain multiple extension cords, which increases resistance and fire risk.
Weatherproofing connections:
Every connection point where cords join should be protected from moisture. Use outdoor-rated cord covers, or position connections under eaves where rain doesn’t reach them. Seal connections with weatherproof electrical tape and position them off the ground.
Water intrusion into electrical connections causes short circuits, equipment damage, and potentially dangerous situations. Outdoor electrical safety requires treating every connection as if rain will eventually reach it.
Load calculations:
Calculate total wattage by adding up all your string light bulbs. Most residential circuits provide 15 or 20 amps at 120 volts, supporting 1,800 to 2,400 watts. LED string lights use minimal power, but older incandescent bulbs can add up quickly.
Divide your total wattage by 120 to find amperage draw. If you’re using more than 80 percent of circuit capacity, split your lights across multiple circuits or upgrade to LED bulbs.
Automation and control:
Install timers or smart switches to automate your string lights. Simple mechanical timers cost under $20 and prevent lights from running all night. Smart switches integrate with home automation systems and allow remote control.
For permanent installations, professional electricians can integrate lighting controls with existing home systems, add dedicated circuits, and ensure all work meets electrical codes.
Weather Considerations for Orange County Covered Patios
Orange County’s coastal climate creates specific challenges for outdoor lighting that differ from other regions.
Marine air and corrosion:
Salt air accelerates corrosion of metal hardware, electrical connections, and light fixtures. Even areas several miles inland experience marine air effects. Choose corrosion-resistant hardware including stainless steel hooks, galvanized or coated steel wire, and weatherproof fixtures.
Clean fixtures and hardware annually to remove salt buildup. Coastal homeowners often need to replace mounting hardware every few years as corrosion weakens connections.
Year-round sun exposure:
Orange County’s intense sun degrades plastics, fades colors, and breaks down wire insulation over time. UV-resistant string lights and wiring materials last significantly longer than standard products.
Even under covered patios, reflected sunlight and ambient UV exposure affect light longevity. Commercial-grade fixtures designed for permanent outdoor installation withstand sun exposure better than consumer products sold for occasional use.
Minimal freeze risk:
Unlike many regions, Orange County rarely experiences freezing temperatures that damage outdoor lights through ice formation or thermal cycling. This advantage allows lighter-weight installations without winter removal.
However, the mild climate encourages year-round outdoor living, meaning your lights run more hours annually than in seasonal climates. This increases wear and the importance of quality components.
Wind considerations:
Santa Ana winds create substantial forces that test string light installations. Secure all mounting points firmly and ensure adequate support for your chosen pattern. Lights with excessive slack between mounting points swing and bounce during windstorms, accelerating hardware failure.
Professional installers familiar with local conditions size hardware and plan installations to withstand typical wind events without damage or dangerous situations.
When to Choose Professional String Lighting Installation
DIY string light projects work well for temporary seasonal displays or simple patterns. Certain situations benefit significantly from professional installation expertise and permanent solutions.
Complex layouts and large spaces:
Patios over 400 square feet with multiple levels, architectural features, or intricate lighting patterns challenge DIY installation. Professionals bring experience creating balanced layouts, calculating proper support requirements, and executing complex installations efficiently.
Permanent, concealed wiring:
The most polished string lighting installation eliminates visible extension cords and mounting hardware through concealed wiring integrated into your patio structure. This requires running low-voltage wiring through posts, beams, or ceiling cavities and installing permanent junction boxes.
Achieving this level of finish without professional help is impractical for most homeowners. The specialized tools, electrical knowledge, and structural understanding required exceed typical DIY capabilities.
Commercial-grade fixture systems:
Professional-grade bistro lights and string lighting systems cost significantly more than consumer products but deliver superior durability, appearance, and longevity. These systems often require specific installation methods and mounting hardware that differs from consumer light strings.
Professionals source commercial fixtures at better pricing than retail channels and understand proper installation techniques for each product line.
Electrical work beyond basic plugging in:
Installing new outdoor circuits, upgrading electrical panels to support additional lighting loads, or integrating controls with home automation systems requires licensed electrical work. Professional installers coordinate with electricians to deliver complete solutions.
HOA or permit requirements:
Some homeowner associations require approval for permanent lighting installations or mandate specific installation methods. Professional installers familiar with local HOA requirements navigate these processes and ensure compliance.
Building permits may apply when adding new electrical circuits or modifying structure to integrate lighting. Professionals handle permitting as part of their service.
Long-term value and warranty:
Professional installations typically include warranties covering both materials and labor. If fixtures fail or mounting hardware loosens, you’re covered. DIY projects offer no such protection.
Over a 10-year timeframe, a professional installation often costs less than multiple DIY attempts, replacement fixtures, and repairs as temporary solutions fail. For comprehensive residential lighting solutions that integrate with your overall outdoor design, professional expertise ensures cohesive results.
Maintenance and Care for Covered Patio String Lights
Even well-installed string lights require ongoing maintenance to preserve appearance and function.
Regular cleaning:
Dust, pollen, and cobwebs accumulate on outdoor fixtures, reducing light output and making your patio look neglected. Clean bulbs and wiring every few months with a soft cloth and mild cleaner.
For hard-to-reach installations, consider hiring professionals for annual cleaning as part of landscape maintenance service.
Bulb replacement:
LED bulbs last significantly longer than incandescent bulbs but eventually fail. Keep spare bulbs on hand and replace burned-out bulbs promptly. Running string lights with multiple failed bulbs creates uneven lighting and emphasizes dead spots.
Some commercial string light systems allow individual bulb replacement. Consumer light strings often require replacing entire sections when bulbs fail.
Hardware inspection:
Check mounting hooks, wire connections, and support cables every six months. Look for loosening hardware, corrosion, or stressed connection points. Tighten loose hooks and replace corroded hardware before failures occur.
Electrical connection protection:
Inspect all electrical connections for water damage, corrosion, or loose contacts. Clean connections with electrical contact cleaner and ensure weatherproof covers remain properly sealed.
Seasonal adjustments:
Even in Orange County’s mild climate, preparing for Santa Ana wind season by securing loose sections and checking hardware strength prevents damage during windstorms.
Professional maintenance services can manage these tasks as part of overall landscape lighting care, ensuring your investment remains functional and attractive year-round.
Integrating String Lights with Overall Patio Lighting Design
String lights work best as part of a comprehensive outdoor lighting strategy rather than as your only light source. Combining string lights with other deck and patio lighting elements creates layered illumination that serves multiple purposes.
Task lighting for dining and cooking:
While string lights provide ambient glow, dedicated task lighting illuminates specific areas where you need visibility for food preparation, dining, or reading. Consider adding downlights over grilling areas, dining tables, or seating zones.
Accent lighting for plants and features:
Uplights on potted plants, architectural details, or garden beds add depth and visual interest beyond what string lights alone achieve. This layering creates a more sophisticated outdoor environment.
Safety lighting for stairs and edges:
Step lights, path lights, or deck rail lighting ensure safe navigation around your patio perimeter and any level changes. String lights don’t provide adequate illumination for these safety-critical areas.
Controlling multiple light types:
Integrate all your patio lighting on coordinated controls so you can adjust ambiance for different activities. Dim or turn off task lighting during relaxed entertaining while keeping string lights glowing, or illuminate everything for active dinner preparation.
For homeowners in specific Orange County communities like Anaheim Hills, working with Anaheim Hills City landscape lighting installers who understand local architectural styles and regulations ensures installations that complement your neighborhood character.
Conclusion
Hanging string lights on covered patios creates beautiful outdoor living spaces for Orange County homeowners. DIY methods using hooks, guide wires, or no-drill alternatives work well for temporary installations or simple layouts. Success requires careful planning, proper materials, and attention to electrical safety.
For permanent installations that withstand year-round use, integrate cleanly into your home’s architecture, and maintain their appearance over many years, professional string lighting installation delivers superior results. The investment in quality fixtures, concealed wiring, and expert installation often proves more economical than repeatedly replacing and repairing temporary DIY solutions.
Whether you choose DIY or professional installation, thoughtfully planned string lights transform covered patios into inviting spaces where families and friends gather, making ordinary evenings memorable.
FAQ
How do you hang string lights on a covered patio?
Hang string lights on covered patios by installing cup hooks or screw eyes into ceiling beams or rafters, spacing them 3 to 4 feet apart. Drape your light strands between hooks, creating gentle curves. For longer spans or heavier lights, use guide wire stretched between end anchors with lights attached to the wire using clips.
What is the best way to attach string lights to a patio?
The best attachment method depends on your ceiling type and whether you want temporary or permanent installation. For wood beam ceilings, cup hooks provide simple, reliable mounting. For permanent installations, guide wire systems offer superior support and professional appearance. For stucco or masonry, use appropriate anchors before installing hooks.
How do you hang outdoor string lights permanently?
Permanent outdoor string light installations use commercial-grade fixtures, corrosion-resistant mounting hardware, and concealed low-voltage wiring integrated into your patio structure. Professional installations run wiring through posts and beams, install permanent junction boxes, and use heavy-duty support systems that withstand weather and wind.
Can you leave string lights outside permanently?
Yes, outdoor-rated string lights designed for permanent installation can remain outside year-round. Use commercial-grade fixtures with weatherproof construction, UV-resistant materials, and corrosion-resistant hardware. Consumer-grade string lights sold for temporary use deteriorate quickly with permanent outdoor exposure.
How to hang string lights on covered patio without nails?
Hang string lights without nails using heavy-duty adhesive hooks rated for outdoor use, gutter clips if your patio has gutters, or tension rods spanning between posts. For truly permanent installations without visible mounting hardware, professional installers can integrate fixtures using concealed systems that don’t require surface-mounted hooks.
How to hang string lights on covered patio without hooks?
Without hooks, use tension rods, freestanding poles with mounting points, or professional concealed mounting systems integrated into architectural features. Guide wire can be secured using alternative anchoring methods like beam clamps or post brackets that don’t require individual hooks for each light strand.
How to hang string lights on deck without drilling?
Use adhesive hooks rated for outdoor surfaces, attach lights to existing deck rails using zip ties or specialized rail clips, employ tension rods between posts, or install freestanding poles that mount to deck surfaces rather than overhead structures. Each method has weight limits and aesthetic considerations.
How to hang string lights on patio ceiling?
Mount string lights to patio ceilings by locating solid beams or rafters, pre-drilling pilot holes, and installing cup hooks or screw eyes sized for your hardware. Space mounting points consistently according to your layout plan, then hang lights creating even drapes between points. For finished ceilings, use a stud finder to locate solid mounting surfaces.
How to hang string lights without poles?
Hang string lights without poles by mounting directly to your patio structure using cup hooks in ceiling beams, guide wire systems stretched between building attachment points, or integration into existing architectural features. Professional installers can create pole-free installations using concealed mounting hardware integrated into posts, beams, or fascia.