

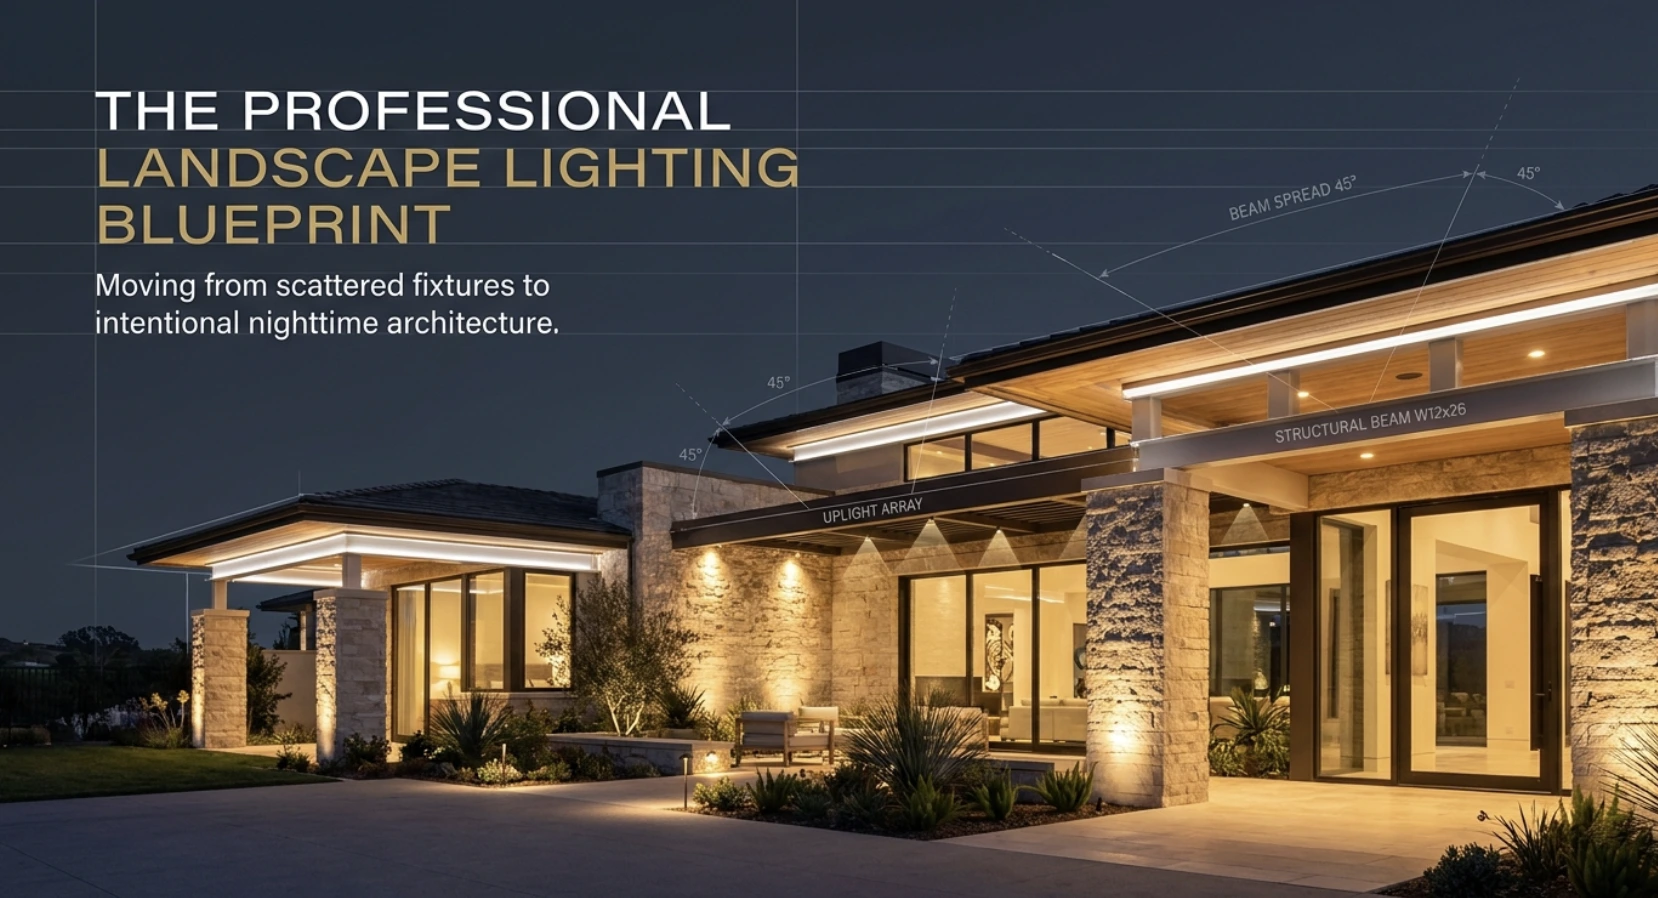
A landscape lighting plan is a scaled layout that maps every fixture, wire run, transformer location, and control zone before installation begins. Start with a nighttime walk-through to identify what needs lighting. Divide the property into zones (entry, entertaining, security, accent). Select fixtures based on application and beam spread. Calculate total wattage per zone and size transformers at 80% capacity. Document everything on a scale drawing. Professional landscape lighting design plans account for voltage drop, view corridors, glare control, and long-term landscape growth. DIY planning works for small projects, but whole-property systems benefit from professional design that prevents costly mistakes.
The difference between landscape lighting that looks intentional and lighting that looks scattered almost always comes down to one thing: the plan. A proper lighting plan for landscape defines exactly where every fixture goes, what it does, and how the system powers and controls it before a single hole is dug or wire is buried.
Skipping the planning phase is the most common mistake homeowners make. Fixtures end up in wrong positions. Transformers get undersized. Wire runs create voltage drop. Glare hits seating areas. And the system either underperforms or requires expensive rework within the first year.
This guide walks through how to plan outdoor lighting from site assessment through final documentation. For broader design principles before you start planning, see our outdoor lighting tips guide. For fixture-specific placement guidance, our outdoor lighting placement guide covers distances and angles for every fixture type.
Step 1: Site Assessment and Nighttime Walk-Through
Every landscape lighting design plan starts with understanding the property as it exists today and how the homeowner actually uses it after dark.
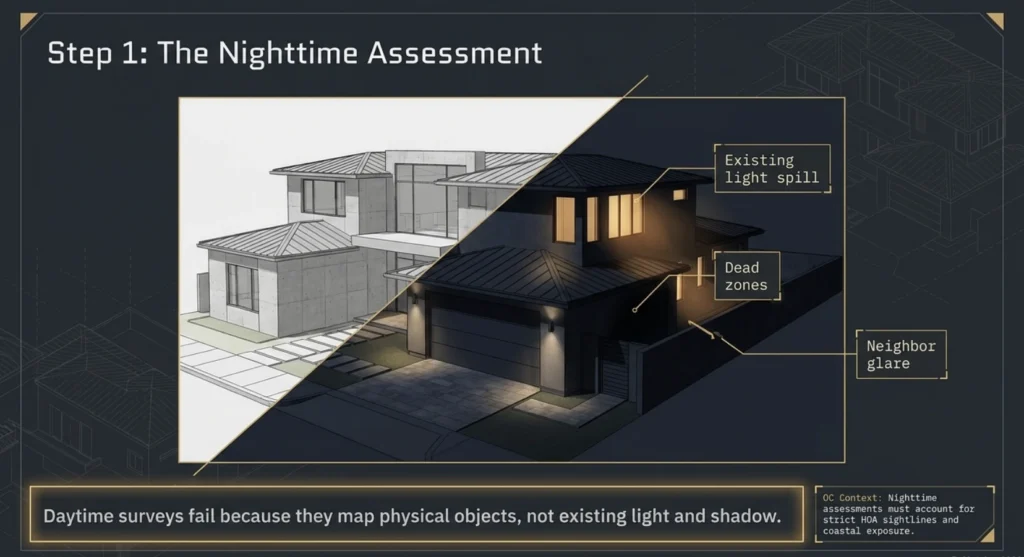
Walk the property at night. This is the single most important step in landscape light planning that most homeowners skip. Daytime surveys miss critical details: where existing light from windows spills onto the yard, which areas feel uncomfortably dark, where glare from neighboring properties intrudes, and how the property looks from the street, from the front door, and from primary indoor seating areas.
Photograph the property from key viewpoints. Capture the front facade from the street, the backyard from the main patio, each side yard, and any views from interior rooms that look out onto the landscape. These reference photos become the foundation for fixture placement decisions.
Note architectural features worth highlighting. Columns, arches, stone facades, textured walls, water features, and distinctive rooflines all present opportunities for accent lighting. Note existing trees, their canopy size, trunk diameter, and species. Record hardscape elements like seat walls, steps, retaining walls, and water features. For Orange County properties specifically, note proximity to the coast (salt air affects material selection) and any HOA guidelines that restrict fixture visibility or placement.
Identify electrical infrastructure. Locate existing outdoor outlets, electrical panels, and potential transformer mounting locations. Note distances from power sources to the farthest planned fixture zones, since this affects wire gauge and voltage drop calculations later in the planning process.
Step 2: Establishing Lighting Zones
Dividing the property into functional lighting zones is what separates a thoughtful outdoor lighting layout from a random collection of fixtures. Each zone serves a distinct purpose and may require its own transformer circuit for independent control.
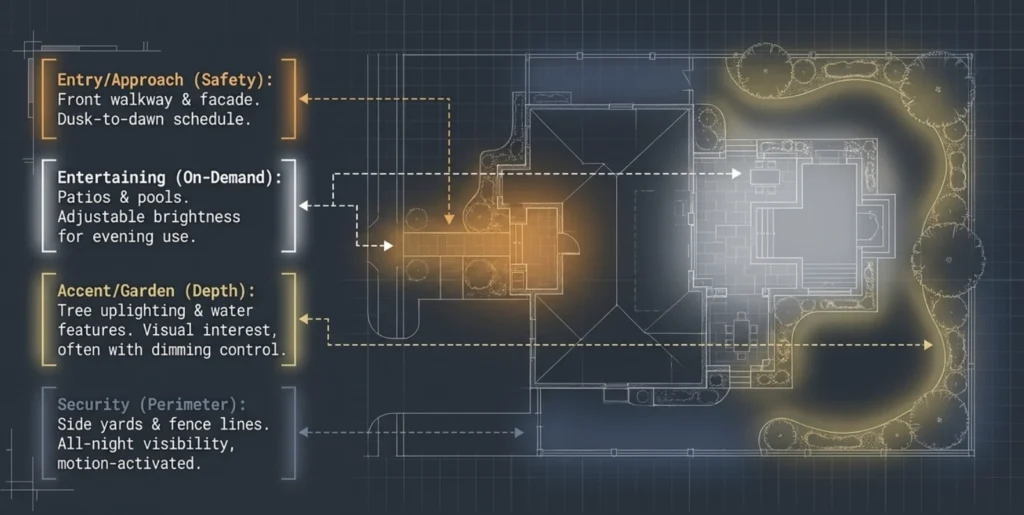
Entry and approach zone. Front walkway, driveway, porch, and facade. This zone creates the first impression and handles safety lighting for arriving guests. It typically runs on a dusk-to-dawn schedule.
Entertaining zone. Patio, outdoor kitchen, pool area, and dining spaces. This zone needs adjustable brightness and may include string lights, strip lighting, and overhead ambient fixtures. It runs on demand or on a schedule tied to evening use.
Accent and garden zone. Tree uplighting, garden bed accents, water features, and architectural highlights. This zone creates depth and visual interest. It runs on the same schedule as entry lighting but may have separate dimming control.
Security and perimeter zone. Side yards, back fence lines, garage approaches, and dark corners. This zone prioritizes visibility and may include motion-activated fixtures. It typically runs all night.
Each zone should be independently controllable. This allows the homeowner to run entry lighting all evening while keeping entertaining lighting off until guests arrive, or to shut down accent lighting at midnight while security lighting stays active. Zoned lighting with appropriate controls is one of the most effective strategies for both energy efficiency and functional flexibility.
Step 3: Selecting Fixtures for Each Application
A lighting plan landscape professionals build always specifies exact fixtures for each position, not just generic fixture types. The fixture determines beam spread, light output, mounting method, and aesthetic impact.
| Application | Fixture Type | Beam Spread | Typical Wattage |
| Path/walkway | Path light | 360 degrees | 2 to 4W |
| Tree uplighting (small) | Spotlight | 15 to 25 degrees | 5 to 8W |
| Tree uplighting (large) | Spotlight or well light | 25 to 40 degrees | 8 to 15W |
| Facade wash | Wall wash or flood | 60 to 120 degrees | 10 to 20W |
| Architectural accent | Spotlight | 10 to 15 degrees | 5 to 10W |
| Step/hardscape | Step light or hardscape | Directed | 1 to 3W |
| Underwater/pool | Submersible LED | Wide flood | 10 to 20W |
| Moonlighting | Downlight (tree-mounted) | 60 to 90 degrees | 5 to 10W |
Material selection matters for longevity. For Orange County properties, commercial-grade solid brass or copper fixtures are the standard for professional installations. These materials resist corrosion from salt air, UV exposure, and irrigation spray that destroy aluminum and plastic fixtures within a few years. The Illuminating Engineering Society emphasizes that fixture material and construction quality directly affect system longevity and long-term performance.
For more on how different fixture types work together, see our guide on types of landscape lighting.
Step 4: Creating the Scale Layout
The outdoor lighting layout is the core document of any professional lighting design. It translates all of your zone planning and fixture selection into a visual map that guides installation.
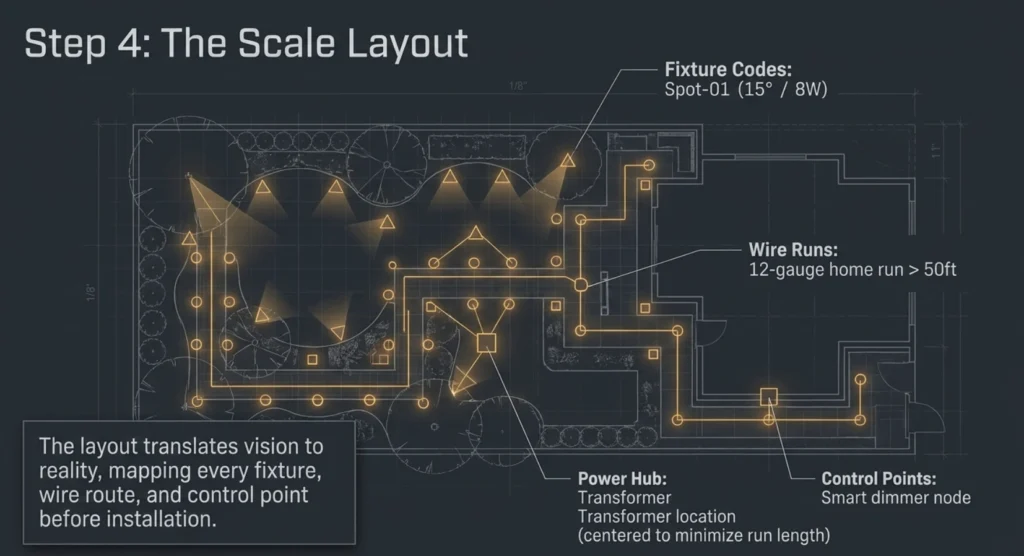
Start with a base plan. Use a property survey, landscape plan, or hand-drawn sketch at a consistent scale (1/8 inch = 1 foot is standard for residential). Include the house footprint, hardscape, major plantings, fences, walls, and all structures.
Mark every fixture position. Use consistent symbols: circles for path lights, triangles for spotlights, squares for well lights, and rectangles for hardscape fixtures. Label each with a fixture code that corresponds to your fixture schedule (a separate document listing every fixture by model, wattage, lamp type, and finish).
Draw wire runs. Show the route from each transformer to every fixture group. Use different line types for different circuits. Note wire gauge at each run. This is where voltage drop calculations become visual. Runs over 50 feet at 12-gauge or over 100 feet at 10-gauge should be flagged for voltage verification.
Mark transformer locations. Place transformers near outdoor GFCI outlets, centered relative to their fixture zones to minimize wire run lengths. Show the rated wattage and number of circuits for each transformer.
Note control points. Indicate which zones connect to timers, dimmers, smart controllers, or motion sensors. Document the control strategy for each zone (dusk-to-dawn, scheduled, on-demand, motion-triggered).
Step 5: Electrical Calculations and Transformer Sizing
The technical backbone of any landscape lighting design plan is the electrical calculation that ensures every fixture receives adequate power without overloading the system.
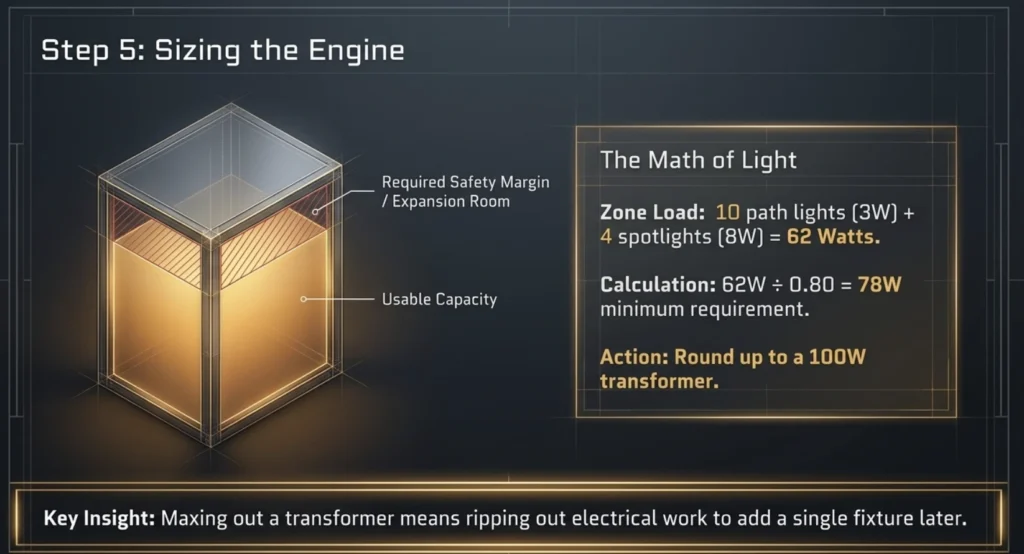
Calculate total wattage per zone. Add up every fixture in the zone. A zone with 10 path lights at 3W each plus 4 tree spotlights at 8W each equals 62 watts total.
Size the transformer at 80% capacity. A 62-watt zone needs a transformer rated at minimum 78 watts (62 / 0.80). In practice, round up to the next available size (100W or 150W) to leave room for future expansion. A property with three zones at 62W, 85W, and 45W (192W total) needs either a single 300W transformer or multiple smaller units.
Calculate voltage drop. The formula is: Voltage Drop = (2 x Wire Length x Total Watts) / (Cable Constant x Voltage). Keep voltage drop below 10% (fixtures should receive at least 10.8V on a 12V system). Long runs require heavier gauge wire or higher transformer taps (13V, 14V, 15V) to compensate. For detailed voltage drop guidance, see our guide on how to install low voltage landscape lights.
Specify wire gauge. 12-gauge wire handles most residential runs over 50 feet. 14-gauge works for shorter, lower-wattage runs. 10-gauge serves long runs on larger properties. Document the wire gauge for every run on the layout drawing.
Step 6: Documenting the Complete Plan
A professional lighting plan landscape homeowners can reference for years includes more than just a fixture layout. Complete documentation makes future maintenance, troubleshooting, and expansion straightforward instead of guesswork.
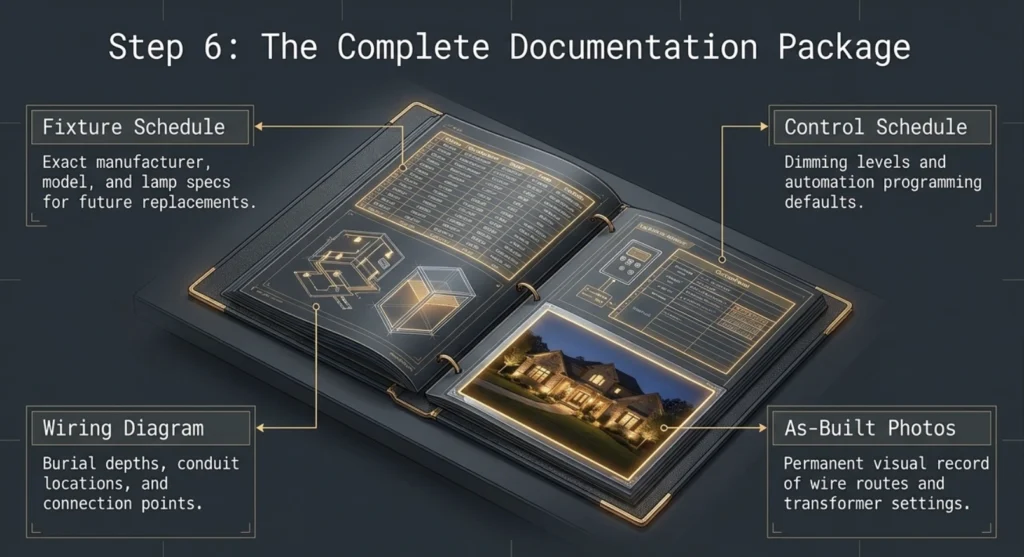
Fixture schedule. A table listing every fixture by position number, manufacturer, model, wattage, beam spread, finish, and lamp type. This document lets any technician identify and replace components years later without reverse-engineering the system.
Wiring diagram. A layout showing every wire run, gauge, connection point, and transformer assignment. Include burial depths and conduit locations at hardscape crossings.
Control schedule. Documents which zones connect to which controllers, timers, or smart systems. Includes default schedules, dimming levels, and any automation programming.
Post-installation photos. Photographs of every fixture in position, wire connection points, transformer settings, and overall system appearance at night. Vision Outdoor Lighting includes comprehensive photo documentation with every installation, creating a permanent record that makes future service calls efficient.
Maintenance notes. Recommended maintenance schedule, lamp replacement intervals, and seasonal adjustment notes (landscape growth may require fixture repositioning over time).
Common Planning Mistakes That Lead to Poor Results
Planning from a daytime perspective only. Properties look completely different after dark. Fixtures planned during the day often create glare or miss key features that only become apparent at night.
Overlighting. More fixtures do not always mean better results. Overlighting flattens depth, creates glare, and wastes energy. Professional lighting design uses contrast and shadow as deliberately as it uses light.
Ignoring landscape growth. Trees grow. Shrubs fill in. A spotlight aimed at a 6-foot tree today will be buried inside the canopy in three years. Plan fixture positions for the landscape at maturity, not at installation.
Undersizing transformers. No room for expansion means ripping out electrical work to add fixtures later. The 80% rule prevents this.
Skipping the documentation. Systems without documentation become black boxes within a year. Nobody remembers wire routes, fixture models, or transformer settings. Every service call becomes a diagnostic exercise instead of a quick fix.
DIY Planning vs Professional Lighting Design
Capable homeowners can create a solid lighting plan for yard projects involving a few path lights, a handful of accent spotlights, and a single transformer zone. The planning principles in this guide apply at every scale, and working through the steps systematically produces better results than improvising during installation.
Whole-property systems with multiple zones, 20+ fixtures, long wire runs, voltage drop management, and integration across architectural, landscape, and entertaining lighting cross into territory where professional lighting design delivers substantial value. A professional designer accounts for view corridors from every window, controls glare from neighboring sightlines, plans for landscape growth over 10 to 15 years, calculates electrical loads and voltage drop across every circuit, and produces documentation that makes the system serviceable for decades.
The investment in professional design also prevents the most expensive outcome: a system that needs to be partially or fully redone because the plan missed something fundamental. Undersized transformers, incorrect wire gauge on long runs, fixtures that create glare into bedroom windows, or spotlights aimed at trees that will outgrow them in two seasons all result from incomplete planning. Professional designers have made these mistakes on other properties and learned from them, which means you don’t pay for those lessons on yours.
For Orange County properties in particular, where HOA guidelines restrict fixture visibility, coastal salt air dictates material selection, and property values justify the investment, professional landscape lighting design ensures the plan matches the property’s potential.
Quick-Reference: Lighting Plan Checklist
| Planning Phase | Key Deliverable |
| Site assessment | Nighttime photos, feature inventory |
| Zone planning | Zone map with control strategy |
| Fixture selection | Fixture schedule with specs |
| Scale layout | Scaled drawing with all positions |
| Electrical planning | Wattage calcs, transformer sizing, wire gauge |
| Documentation | Complete plan package for installation |
| Post-installation | Photos, as-built drawings, maintenance notes |
Get a Professional Landscape Lighting Plan for Your Property
This guide covers how to create a lighting plan landscape homeowners can use for DIY projects or to evaluate a contractor’s design approach. For whole-property systems where design precision, voltage management, HOA compliance, and long-term performance matter, professional planning delivers results that ad-hoc approaches cannot match.
For a professional landscape lighting plan tailored to properties in Newport Beach, Laguna Niguel, Coto de Caza, or anywhere in Orange County, contact Vision Outdoor Lighting or call (949) 877-3600. Every project is owner-led, uses commercial-grade solid brass fixtures, and includes complete system documentation.
Visit our landscape lighting installation page to learn more about the professional process from plan to completion.